Workflow
The Workflow feature provides a visual interface for managing your AI assistant's conversation flow and tool configuration. Use the interactive flowchart to understand how your assistant routes calls, transfers to specialists, and executes actions throughout a conversation.
Overview
Workflow helps you:
- Visualize conversation flow - See how your assistant connects tools and actions.
- Manage assistant tools - Add, edit, and configure tools like Transfer and Hang Up.
- Understand call routing - Track how calls move through your system.
- Optimize assistant behavior - Identify and improve conversation paths.
Accessing workflow
To access the Workflow interface:
- Navigate to AI Assistants in the portal.
- Select your assistant from the list.
- Click the Workflow tab in the assistant editor.
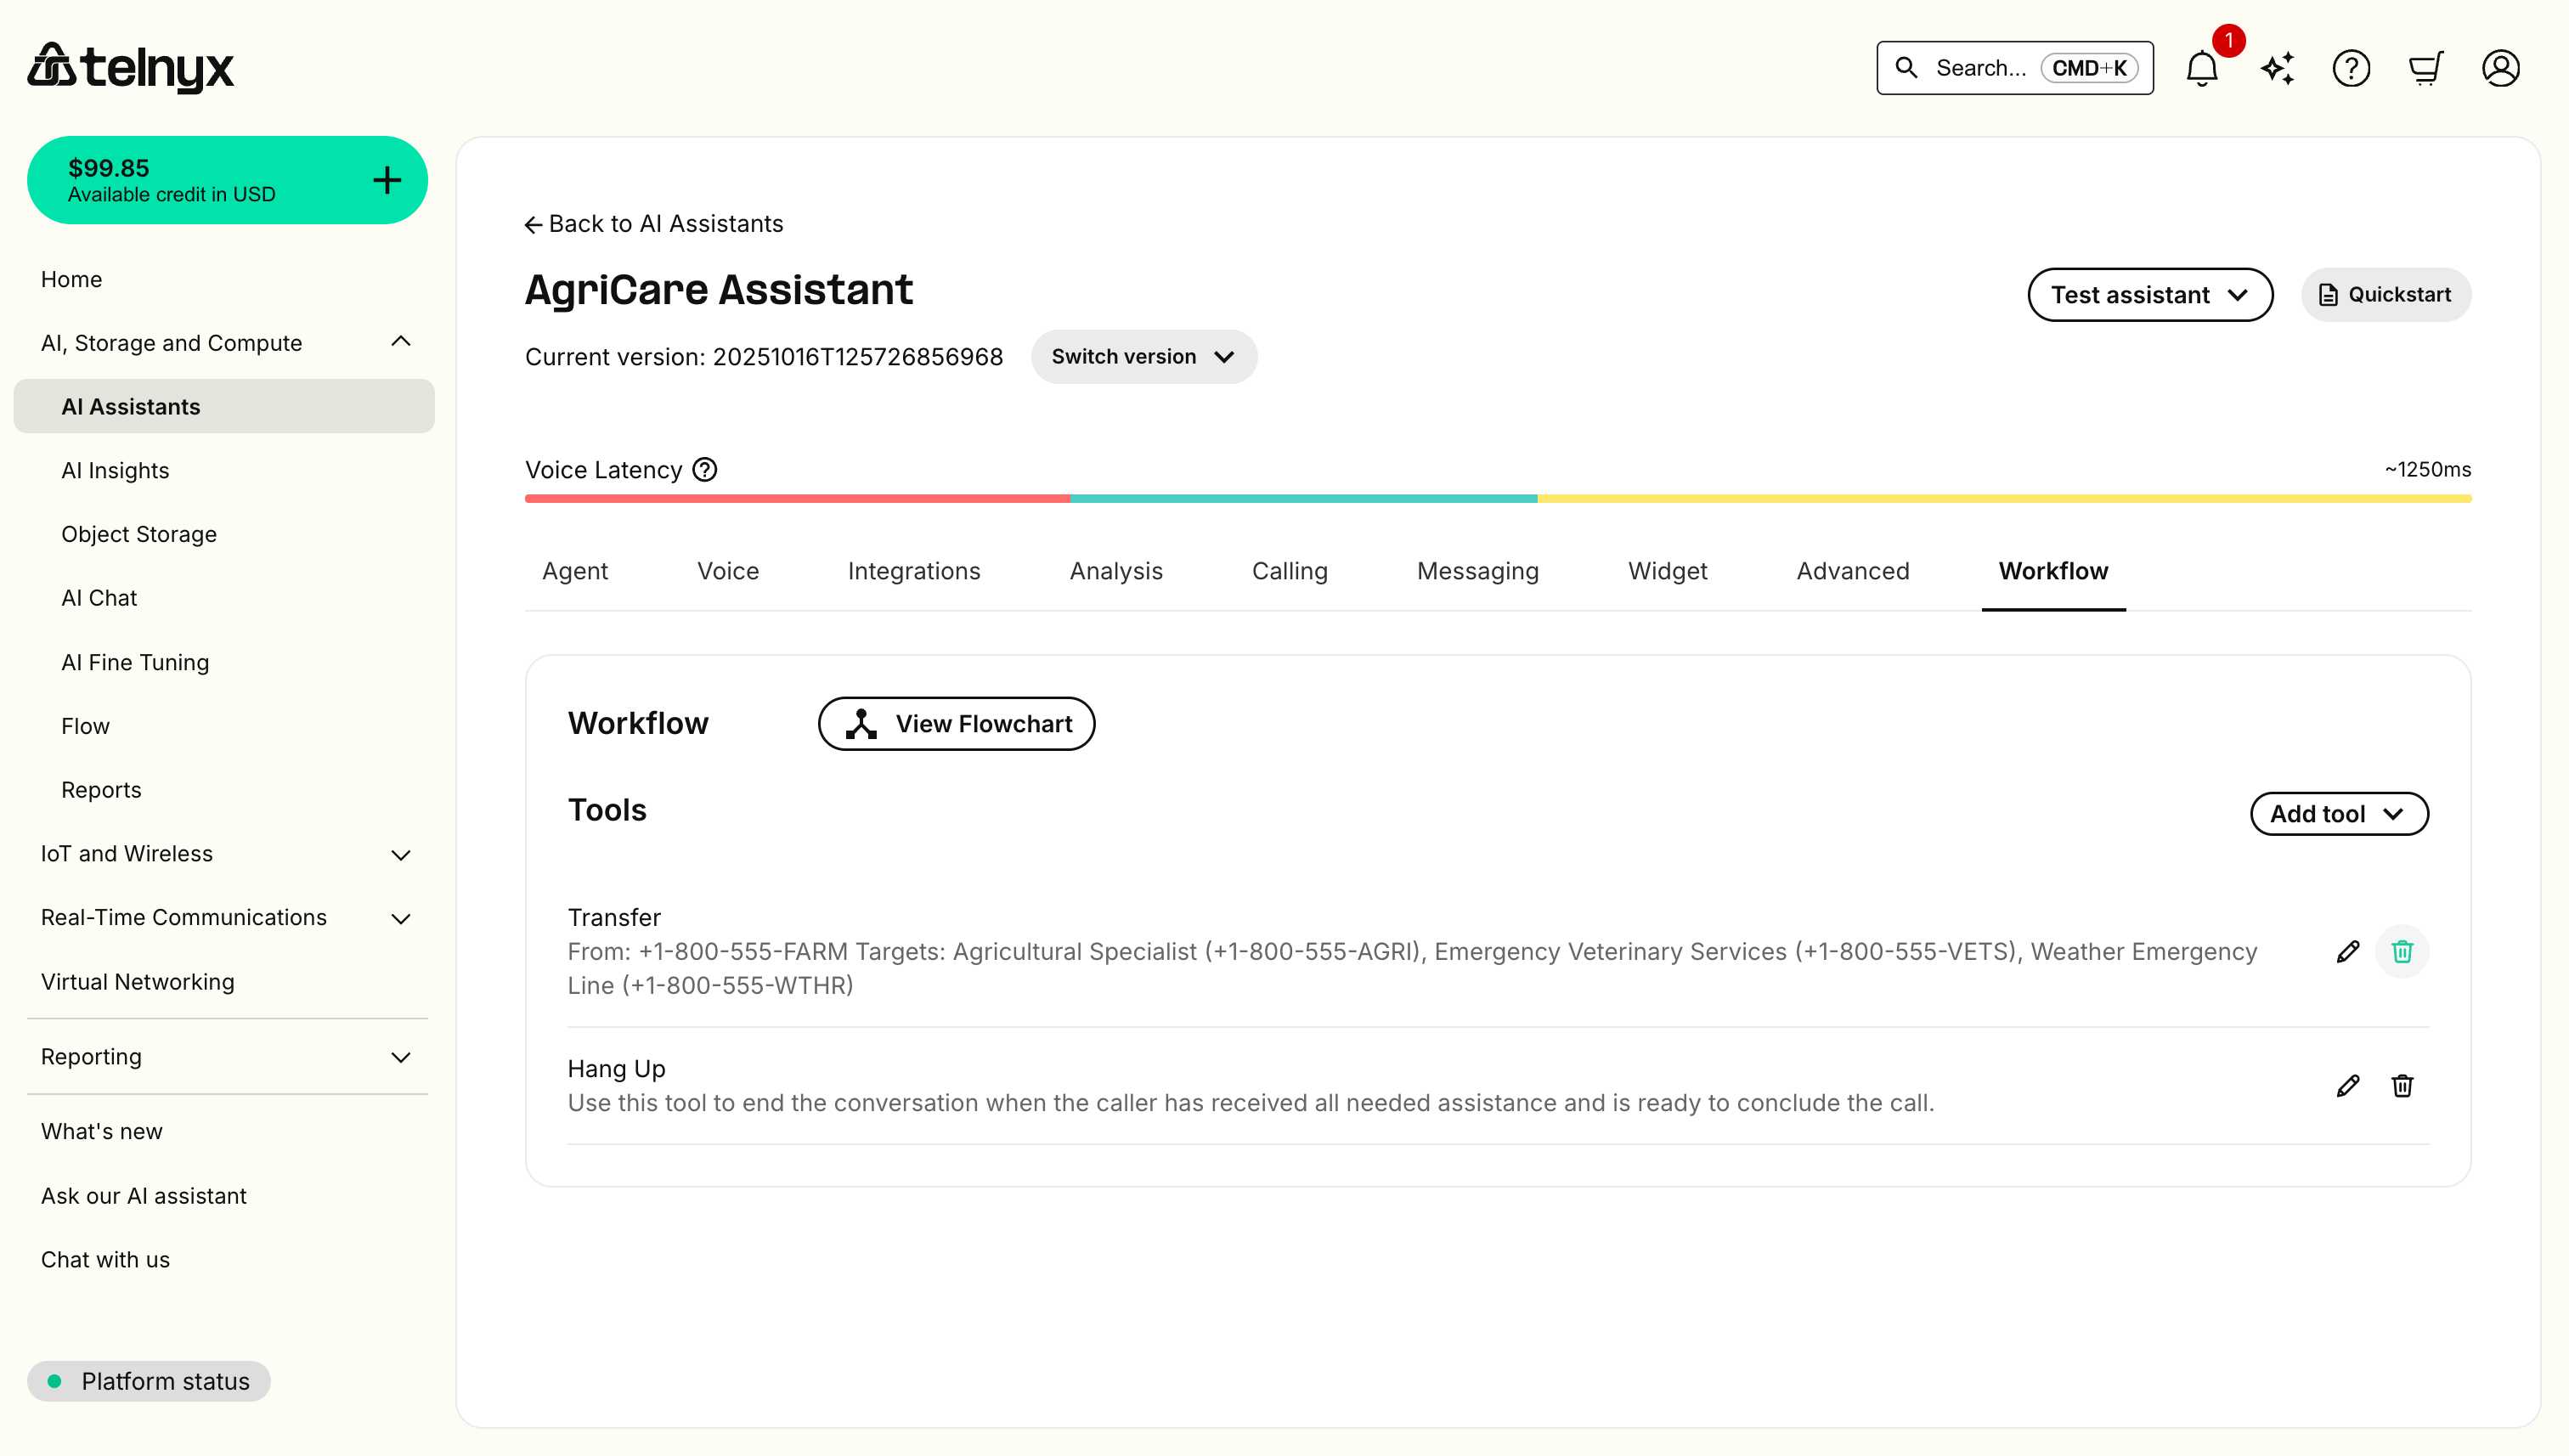
The Workflow tab displays:
- Tools section - List of configured tools with edit/delete options.
- View Flowchart button - Opens the visual flowchart interface.

Managing tools
The Tools section shows all tools configured for your assistant. Each tool can perform specific actions during conversations.
Adding a tool
- Click Add tool in the Workflow tab.
- Select a tool type:
- Webhook - Connect to external services.
- Handoff - Transfer to another AI assistant.
- SIP Refer - Transfer using SIP protocol.
- Send DTMF - Send touch-tone signals.
- Configure the tool's settings.
- Save your changes.

Editing a tool
- Locate the tool in the Tools list.
- Click the edit icon (pencil).
- Update the tool configuration.
- Save your changes.
![]()
Deleting a tool
- Locate the tool in the Tools list.
- Click the delete icon (trash).
- Confirm the deletion.
Deleting a tool removes it from your assistant's capabilities. Ensure the tool is not critical to your conversation flow before removing it.
Understanding the flowchart
The flowchart view provides a visual representation of your assistant's conversation flow.
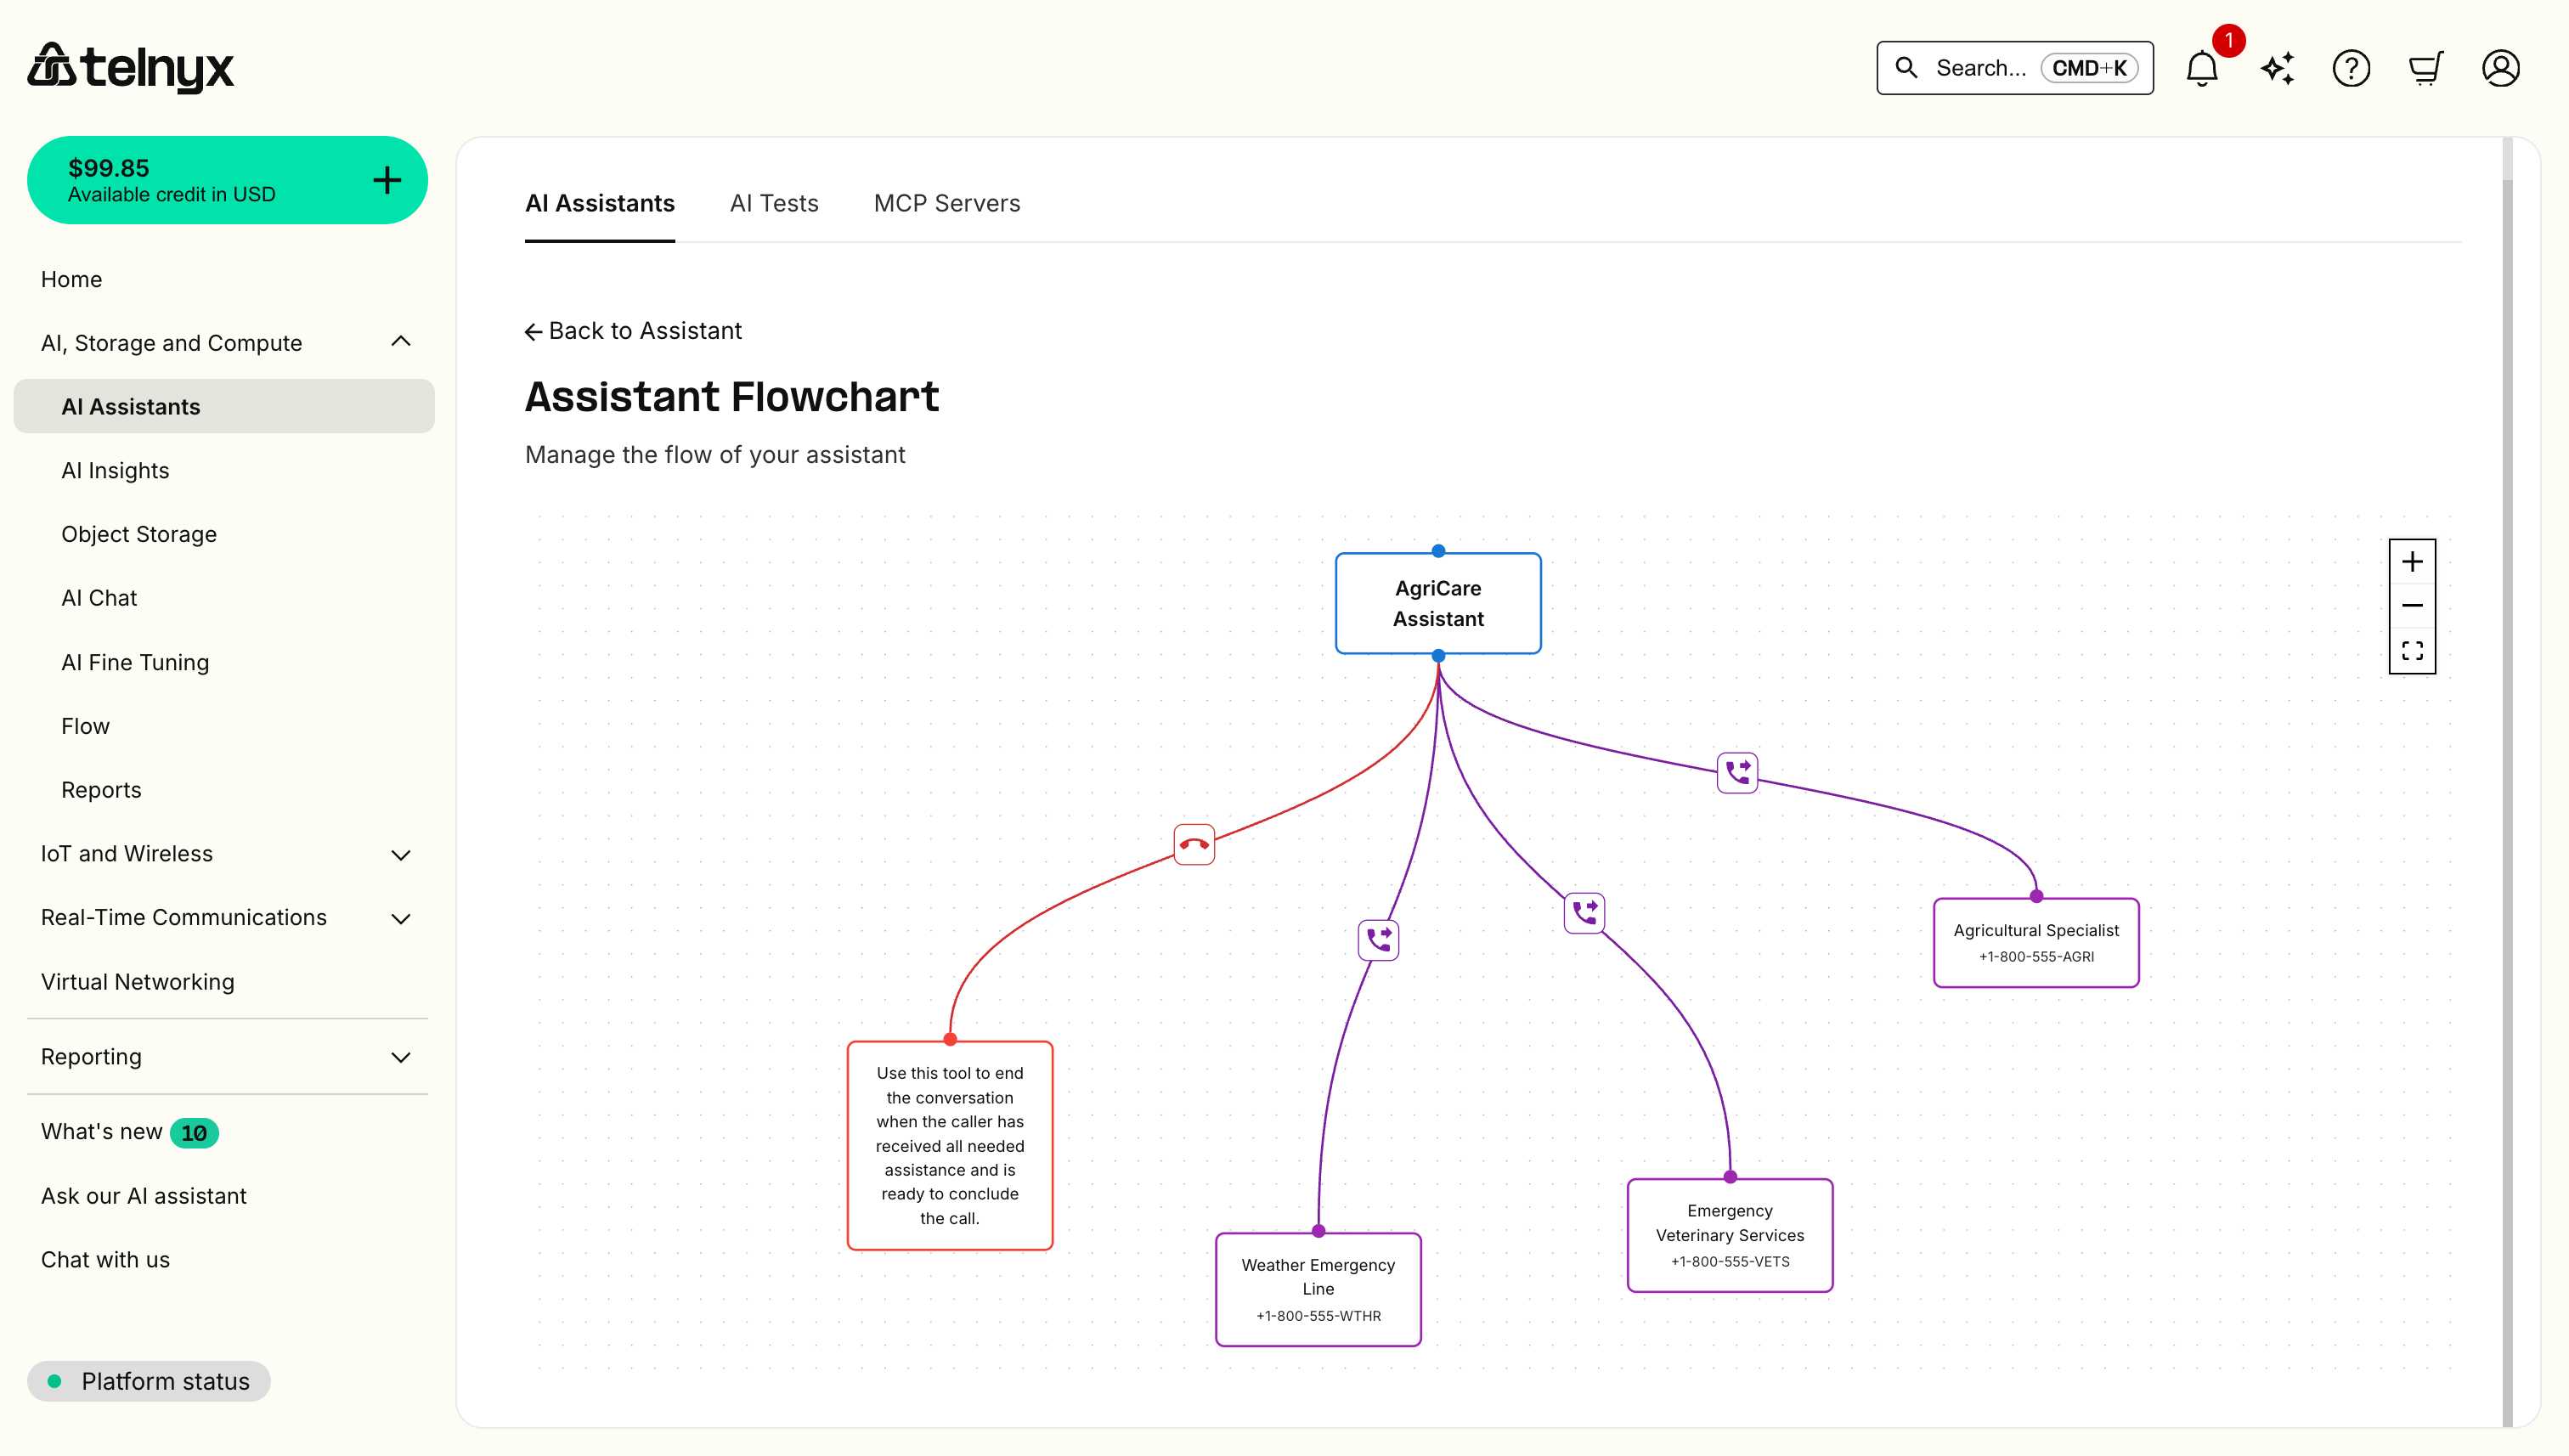
Flowchart components
Assistant node (top of diagram)
- Represents your main AI assistant.
- Shows the assistant name.
- All conversation flows start from this node.
Tool nodes (connected nodes)
- Represent configured tools.
- Color-coded by tool type.
- Display tool name and configuration details.
Connection arrows
- Show how tools connect.
- Color-coded to indicate relationships:
- Purple - Transfer connections.
- Red - Hang Up connections.
- Blue - Other actions.
Control panel (bottom right)
- Zoom In (+) - Enlarge the flowchart.
- Zoom Out (-) - Shrink the flowchart.
- Fit View - Auto-fit the entire flowchart to your screen.

Interacting with the flowchart
- Zoom - Use the control panel or mouse wheel.
- Pan - Click and drag the canvas.
- Inspect nodes - Hover over nodes to see details.
- Navigate back - Click "Back to Assistant" to return to the Workflow tab.
Use cases
Multi-department routing
Create workflows that route callers to different departments based on their needs:
Main Assistant
├── Sales Department Transfer
├── Support Department Transfer
├── Billing Department Transfer
└── Hang Up
Emergency handling
Design workflows that prioritize urgent situations:
Emergency Hotline Assistant
├── Critical Emergency Transfer (Immediate)
├── Non-Critical Transfer (Queue)
├── Information Only (Continue conversation)
└── Hang Up
Appointment scheduling
Build workflows for scheduling and confirmation:
Scheduling Assistant
├── Check Availability (Webhook)
├── Book Appointment (Webhook)
├── Send Confirmation (Webhook)
├── Transfer to Human Agent
└── Hang Up
Best practices
Design clear flow paths
- Keep flows simple - Avoid overly complex routing.
- Limit transfer targets - Too many options confuse callers.
- Test thoroughly - Verify all paths work as expected.
Use descriptive names
- Name tools clearly - Use descriptive labels (e.g., "Emergency Veterinary Services" instead of "Transfer 1").
- Add descriptions - Provide context for when each tool should be used.
Monitor and optimize
- Review flowcharts regularly - Ensure flows match business needs.
- Analyze call patterns - Identify frequently used paths.
- Update as needed - Adjust tools based on caller behavior.
Consider caller experience
- Minimize transfers - Reduce how often callers are transferred.
- Provide context - Ensure transferred calls include relevant information.
- Always offer exit - Include Hang Up option when assistance is complete.
Common workflow patterns
Simple routing workflow
Basic pattern for routing to departments:
- Assistant greets caller.
- Assistant determines caller's need.
- Assistant transfers to appropriate department or continues conversation.
- Caller receives assistance or hangs up.
Multi-tier support workflow
Escalation pattern for complex issues:
- Assistant attempts to resolve issue.
- If unresolved, transfer to Level 1 support.
- If still unresolved, transfer to Level 2 specialist.
- Issue resolved or callback scheduled.
Information gathering workflow
Pattern for collecting data before routing:
- Assistant greets and identifies purpose.
- Assistant gathers required information.
- Assistant uses webhook to validate/process data.
- Assistant routes to appropriate destination or confirms completion.
Related resources
- Integrations - Learn how to connect external services that appear in your workflow.
- Agent Handoff - Understand how to transfer between multiple AI assistants.
- Dynamic Variables - Pass data between workflow steps.
- Testing Assistants - Test your workflows before deploying to production.